
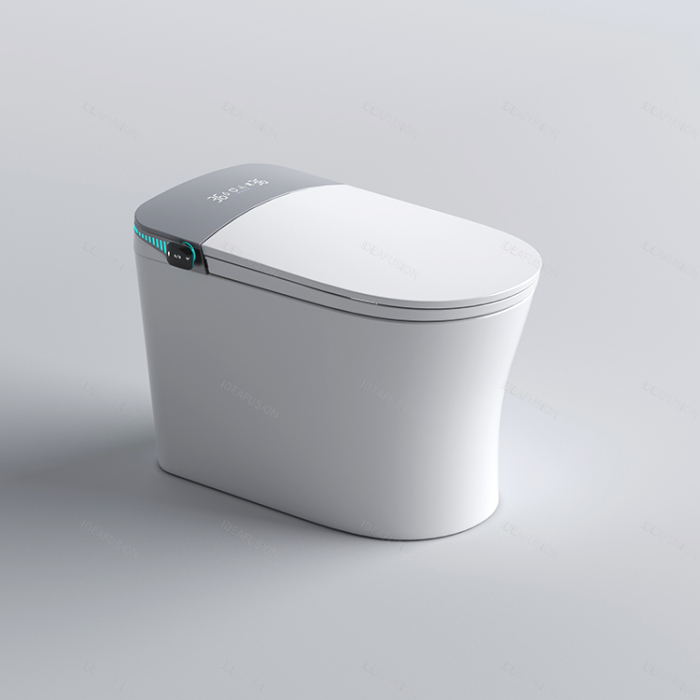


Smart Toilet M939

Details
Redefining the Modern Bathroom Experience
When technology transforms the bathroom experience through seamless, intuitive interaction, there is no need to bend down or search for buttons.
Every function is designed to work effortlessly, turning every use into a more comfortable and intuitive experience.
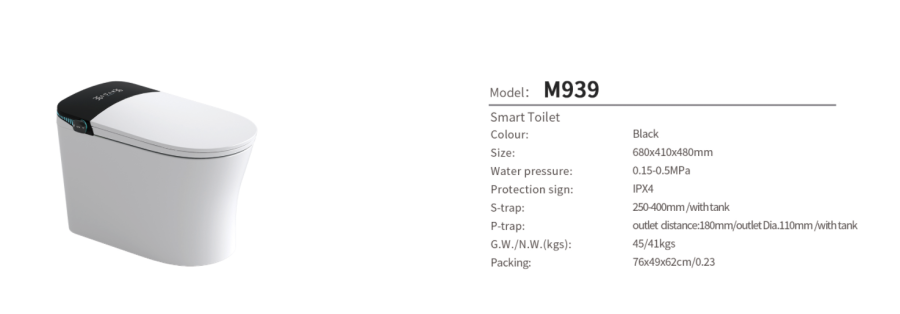
Product Specifications
| Specification | Details |
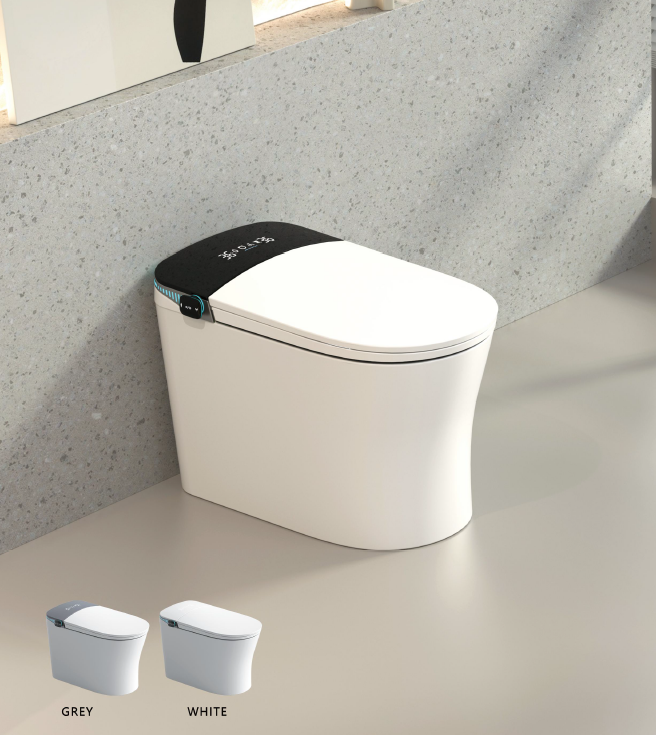
| Colour | White, Grey, Black |
| Dimensions | 680D × 410W × 480H mm |
| S-Trap Distance | 250–400 mm |
| Water Pressure | 0.15–0.5 MPa |
| Protection Rating | IPX4 |
| Gross / Net Weight | 45 / 41 kgs |
| Packing Size | 76 × 49 × 62 cm |
| Packing Volume | 0.233 m³ |
| Configuration | With water tank |
Configuration Options
•JSZ – Basic Configuration: Essential smart toilet functions with automatic flushing.
•E – High-End Configuration: Enhanced functions with automatic operation and Bluetooth connection to play music.
•F – Top-End Configuration: Premium configuration with automatic operation, voice control and a built-in foam shield.
Multi-Layer Air Filtration & Deodorisation
A composite filtration system with columnar activated carbon uses a multi-layer structure to effectively decompose and adsorb odours.
1. Hip Wash
2. Feminine Wash
3. Wireless Remote Control
4. Digital Display
5. Warm Air Drying
6. Child Cleaning
7. Water Temperature Adjustment
8. Water Pressure Adjustment
9. Nozzle Position Adjustment
10. Mobile Cleaning
11. Cold and Hot Massage
12. High and Low Massage
13. Air Temperature Adjustment
• 14. Seat Heating
• 15. Seat Temperature Adjustment
• 16. Self-cleaning Nozzle
• 17. Oxygen-rich Cleaning
• 18. One-touch Cleaning
• 19. Instant Heating and Constant Temperature
• 20. Antibacterial Seat
• 21. Overheat Protection
• 22. Soft Night Light
• 23. Convenient Rotary Knob
• 24. Leakage Protection
• 25. Flush During Power Outage
• 26. Seat Sensor
Dots are included as basic functional elements, the undotted are functions that can be upgraded by selection.
Special features
· Water temperature regulation
· Ultraviolet sterilization
· Heated seat with four-level temperature adjustment
· High-definition display
· Foot Sensor Auto open seats and lid
· Warm air dryer
· Dual-user memory function
Certifications include CE, ISO9001, WaterMark, Intertek, CUPC, CEC, WaterSense, ADA Compliant
Attention
Daily Maintenance
Before cleaning or carrying out any maintenance, be sure to disconnect the power supply and turn off the water supply to the toilet.
1. Removing the Toilet Seat/Main Unit for Cleaning
To remove the toilet seat/main unit, lift the unit vertically while gently lifting it away from the fixing plate. The lifting height must be less than 10 cm.
A water inlet hose is connected between the main unit and the ceramic toilet bowl. Do not lift the unit forcefully or higher than 10 cm, as this may damage or disconnect the water inlet hose, resulting in water leakage.
Warning: Do not place the product upside down, as this may damage the product or create a risk of fire.
2. Cleaning the Main Unit and Ceramic Bowl
Main Unit: Use a soft, damp cloth that has been thoroughly wrung out to wipe the surface.
If necessary, use a small amount of neutral kitchen detergent, then wipe the surface again with a clean, damp cloth.
Ceramic Bowl: Use a soft, damp cloth to clean the ceramic surface. For stubborn or heavy dirt, an appropriate toilet/ceramic-specific cleaner may be used. After cleaning, thoroughly rinse the ceramic surface with clean water and wipe it dry.
Note: Do not use cleaners containing fluorine, strong acids, or other corrosive chemicals when cleaning the ceramic bowl.
Reinstalling the Main Unit
After cleaning, when placing the main unit back onto the ceramic toilet bowl, check that the water inlet hose and flushing hose are not kinked, folded, twisted, or trapped.
Ensure that all hoses are properly straightened and connected before use. Improperly positioned hoses may result in reduced or ineffective flushing performance.
3. Filter Cleaning
If impurities in the tap water block the filter screen, this may reduce water flow into the product and affect its normal operation. The filter screen should be cleaned regularly.
As cleaning frequency depends on the local water quality, it is recommended that the filter be cleaned once every six months.
Before cleaning the filter, turn off the water supply. Then, open the filter cover by turning it counterclockwise and remove the filter.
Rinse the dirt and impurities from the filter with clean water. If necessary, use a soft toothbrush to clean the filter screen.
After cleaning, reinstall the filter and tighten it by turning it clockwise. Turn on the water supply and check carefully for any water leakage.
4. Nozzle Cleaning
Nozzle cleaning must be carried out while the product is connected to the power supply.
When no one is seated on the toilet, press the “Nozzle Cleaning” button. The nozzle will automatically extend and remain extended for 120 seconds.
During this time, gently clean the nozzle and nozzle pipe with a soft-bristled brush or soft toothbrush.
After cleaning, press the “Nozzle Cleaning” button again.
The nozzle will move back and forth automatically to rinse and clean the nozzle pipe.
Press the “Stop” button to end the cleaning cycle.
5. Remote Control and Flushing Batteries
The remote control uses 7# batteries, with a voltage of 1.5V.
The flushing battery is a lithium-manganese battery with a
voltage of 12 V, or eight 5# alkaline batteries with a total voltage of 12 V, or a 9 V alkaline battery.
Important Battery Safety Instructions:
- Install the batteries correctly according to the + and − polarity markings.
- Remove the batteries if the product will not be used for an extended period.
- Replace the batteries promptly when their power is low, as insufficient battery power may affect the signal or product operation.
- When disposing of batteries, insulate the terminals with adhesive tape.
- Keep batteries out of the reach of infants and young children.
- If battery electrolyte comes into contact with your skin or body, wash the affected area thoroughly with clean water immediately.
- If battery electrolyte accidentally enters your eyes, do not rub your eyes. Rinse thoroughly with clean water and seek medical attention immediately.
- If a battery is accidentally swallowed, seek medical attention immediately.
- If battery electrolyte enters the eyes, it may cause serious eye injury or blindness. Rinse immediately with plenty of clean water and seek medical attention.
Warning: Due to the high humidity in bathrooms, for safety reasons, it is not recommended to keep the backup battery connected for extended periods.
Connect the backup battery only when necessary.
When handling or using batteries:
- Do not carry or store batteries together with metal objects, such as necklaces, watches, or other metal products.
- Do not mix old and new batteries.
- Do not disassemble batteries or place them in water or fire.
- Keep remote control batteries away from heat sources and direct sunlight.
- Do not attempt to charge non-rechargeable batteries.
- Do not squeeze, puncture, or otherwise damage the batteries.
Warning: Failure to follow these instructions may cause battery leakage or overheating, which could result in an explosion or fire.


